Monday, December 27, 2010

Solution for - Acer Aspire One (happy) Netbook - Ethernet Problem - for both Win7 and Ubuntu 10.04 OS

I bought the Acer Aspire one happy.But i was not able to connect to internet due to ethernet problem in my netbook.So i did some fix for it in my Ubuntu 10.04 os.
Find out which manufacturers Ethernet card you are using by the following commands.
lspci
$ lspci
00:00.0 Host bridge: Intel Corporation Mobile 945GME Express Memory Controller Hub (rev 03)
00:02.0 VGA compatible controller: Intel Corporation Mobile 945GME Express Integrated Graphics Controller (rev 03)
00:02.1 Display controller: Intel Corporation Mobile 945GM/GMS/GME, 943/940GML Express Integrated Graphics Controller (rev 03)
00:1b.0 Audio device: Intel Corporation 82801G (ICH7 Family) High Definition Audio Controller (rev 02)
00:1c.0 PCI bridge: Intel Corporation 82801G (ICH7 Family) PCI Express Port 1 (rev 02)
00:1c.1 PCI bridge: Intel Corporation 82801G (ICH7 Family) PCI Express Port 2 (rev 02)
00:1c.2 PCI bridge: Intel Corporation 82801G (ICH7 Family) PCI Express Port 3 (rev 02)
00:1d.0 USB Controller: Intel Corporation 82801G (ICH7 Family) USB UHCI Controller #1 (rev 02)
00:1d.1 USB Controller: Intel Corporation 82801G (ICH7 Family) USB UHCI Controller #2 (rev 02)
00:1d.2 USB Controller: Intel Corporation 82801G (ICH7 Family) USB UHCI Controller #3 (rev 02)
00:1d.3 USB Controller: Intel Corporation 82801G (ICH7 Family) USB UHCI Controller #4 (rev 02)
00:1d.7 USB Controller: Intel Corporation 82801G (ICH7 Family) USB2 EHCI Controller (rev 02)
00:1e.0 PCI bridge: Intel Corporation 82801 Mobile PCI Bridge (rev e2)
00:1f.0 ISA bridge: Intel Corporation 82801GBM (ICH7-M) LPC Interface Bridge (rev 02)
00:1f.1 IDE interface: Intel Corporation 82801G (ICH7 Family) IDE Controller (rev 02)
00:1f.2 SATA controller: Intel Corporation 82801GBM/GHM (ICH7 Family) SATA AHCI Controller (rev 02)
00:1f.3 SMBus: Intel Corporation 82801G (ICH7 Family) SMBus Controller (rev 02)
01:00.0 Ethernet controller: Atheros Communications Inc. AR242x 802.11abg Wireless PCI Express Adapter (rev 01)
03:00.0 Ethernet controller: Attansic Technology Corp. Device 1062 (rev c0)
sudo lshw -C network 

$ sudo lshw -C network
  *-network              
       description: Wireless interface
       product: AR242x 802.11abg Wireless PCI Express Adapter
       vendor: Atheros Communications Inc.
       physical id: 0
       bus info: pci@0000:01:00.0
       logical name: wmaster0
       version: 01
       serial: 00:26:5e:2b:1d:b4
       width: 64 bits
       clock: 33MHz
       capabilities: pm msi pciexpress msix bus_master cap_list logical ethernet physical wireless
       configuration: broadcast=yes driver=ath5k_pci latency=0 module=ath5k multicast=yes wireless=IEEE 802.11bg
If the Ethernet card is Atheros Communications then do the following steps.
Step 1:
----------
 Edit the following file   sudo gedit /etc/network/interfaces
make the changes as follows

auto lo
iface lo inet loopback
auto ath0
iface eth0 inet dhcp
Now save the file .If now also the ethernet is not detecting then do the following step also.
Step 2:
-------------
Driver Installed and Problem Solved. Now online.

Finally I found my way out following this thread,
http://ubuntuforums.org/showthread.p...ht=D250&page=2

SOLUTION:

Download AR81Family-linux-v1.0.0.10.tar.gz from
http://partner.atheros.com/Drivers.aspx
Put it in a directory

Code:
$ gunzip AR81Family-linux-v1.0.0.10.tar.gz
$ tar xvf AR81Family-linux-v1.0.0.10.tar
$ cd src
$ make
$ sudo make install
$ cd /lib/modules/2.6.28-11-generic/kernel/drivers/net/atl1e/
$ sudo insmod ./atl1e.ko
(For Windows please choose the appropriate driver from the following link http://partner.atheros.com/Drivers.aspx )
Thus the driver is installed and the eth0 deviced can be detected and configured. Problem solved.

If the above solution is not working then you can go for the below link, where i have a updated one posted.
http://sivanihonjin.blogspot.com/2011/11/acer-aspire-one-happy-netbook-driver.html

Now you are done. Happily browse and enjoy
Thanks to:
http://ubuntuforums.org/showthread.php?t=1244898

Sunday, December 19, 2010

How to Run Android Applications on Ubuntu


When Google announced and released Android, back in October 2008, everyone knew that it would become the best operating system for mobile devices. Not only is Android open source, but it also comes with a Software Development Kit, which offers the necessary APIs and utilities for developers to easily build powerful applications for Android-powered mobile devices. The following tutorial was created especially for those of you who want to test the Android platform and install various applications, on the popular Ubuntu operating system. OK, so let's get started... shall we?

Grab the Android SDK from Softpedia and save the file on your home folder.

Editor's note: The tutorial was rewritten for the new Android 2.0 or later, which provides a graphical user interface to setup a virtual device and the SD card. This makes everything a lot easier. No more command-line madness!

Step 1 - Installing the requirements

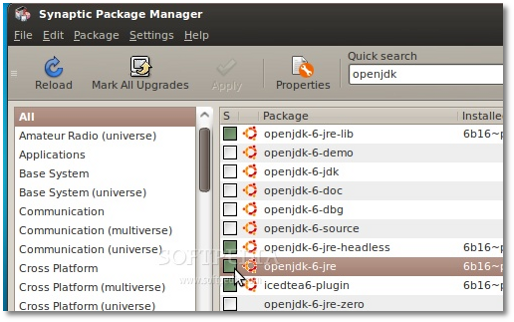
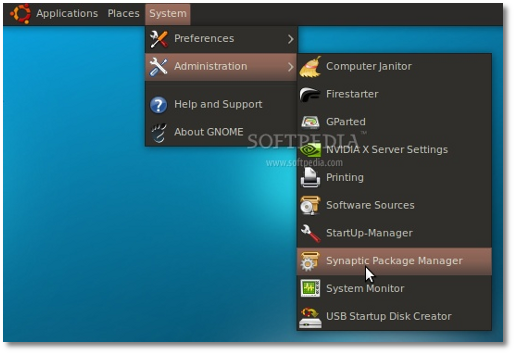
Until the download is over, make sure that you have Java installed and the 32-bit libraries (for the x86_64 users ONLY). If you don't have Java (or the 32-bit libraries), go to System -> Administration -> Synaptic Package Manager...

Review image

...search for openjdk and double-click on the openjdk-6-jre entry...

Review image

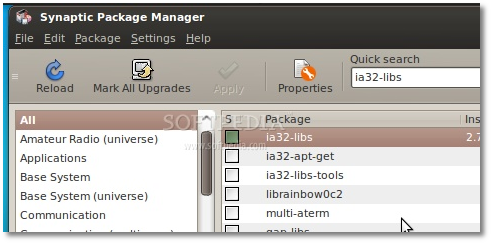
...then, search for ia32-libs (ONLY if you are on a x86_64 machine), and double-click on the ia32-libs entry...

Review image

Now, click the "Apply" button to install the packages. Wait for the packages to be installed and close Synaptic when the process is finished.

Step 2 - Android Setup

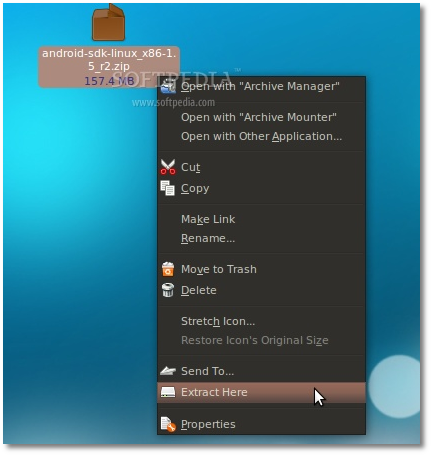
When the Android SDK download is over, right-click on the file and choose the "Extract Here..." option...

Review image

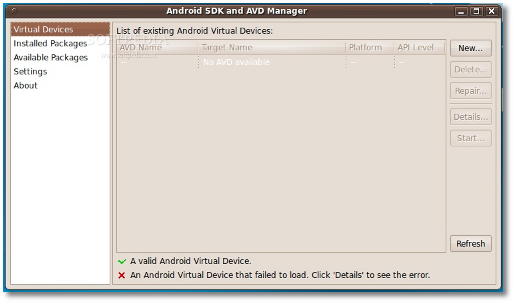
Enter the extracted folder, then enter the tools folder and double click the android file. Click on the "Run" button when you will be asked what you want to do, and the Android SDK and AVD Manager interface will appear...

Review image

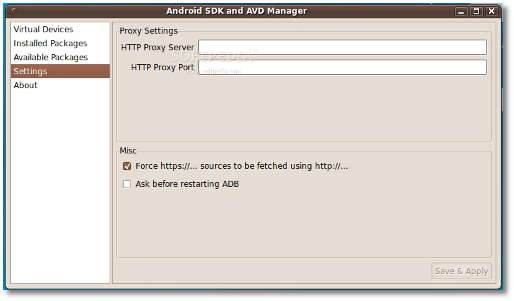
Go to the "Settings" section and make sure you check the "Force https://..." box. Click the "Save & Apply" button....

Review image

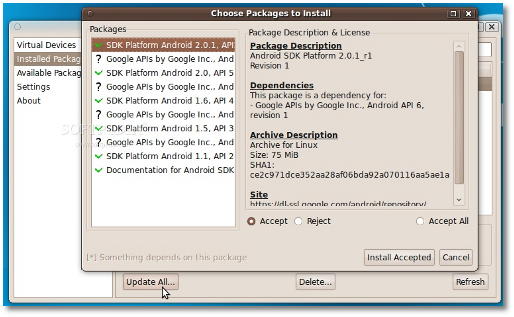
Now go to the "Installed Packages" section and click the "Update All" button. A window will appear with all the available updates. Click the "Install Accepted" button...

Review image

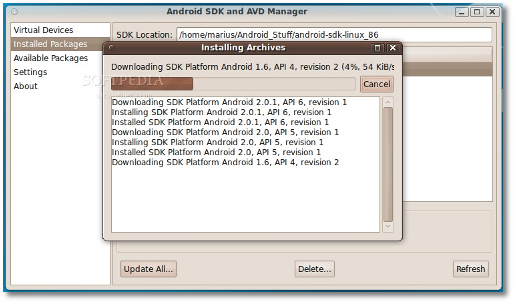
...and wait for the packages to be downloaded and installed. It will take a while if you have a slow bandwidth, so go see a movie or something until it finishes...

Review image

Close the update window when it's done and you will see all the installed SDKs in the "Installed Packages" section.

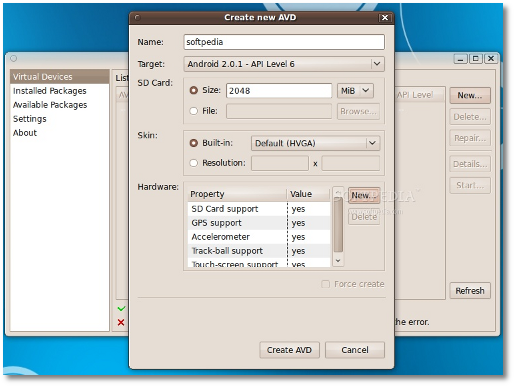
And now, let's create the virtual device. Go to the "Virtual Device" section and click the "New" button. In the new window do the following:

- put a name to the device;
- select a target (Android system);
- put the size for the SD Card;
- add the hardware you want have in the emulator.

It should look something like this...

Review image

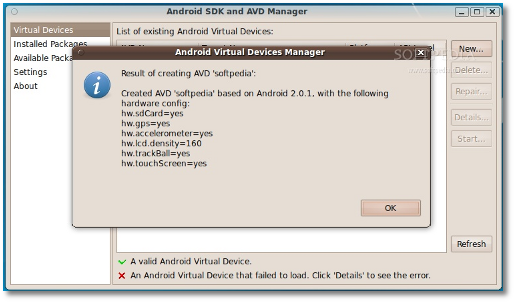
Click the "Create AVD" button when you're done setting up the virtual device and wait for it to finish. It takes about 1 minute, and you'll be notified by a pop-up...

Review image

Note: In the above setup, we've created a virtual device for Android 2.0.1 with a 2 GB SD card and the following hardware components: SD Card, GPS, Accelerometer, Track-ball and touch-screen.

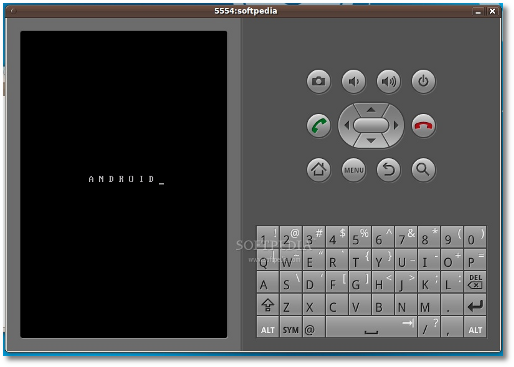
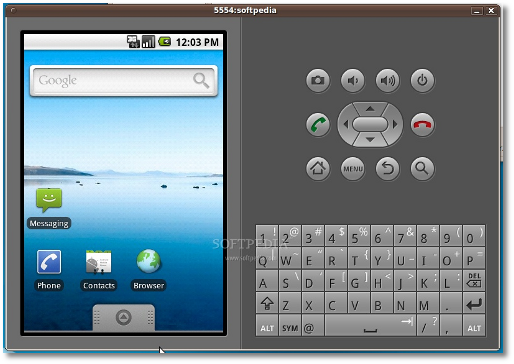
Now click the "Start" button, and the "Launch" button from the next dialog, and the emulator will start...

Review image

Review image

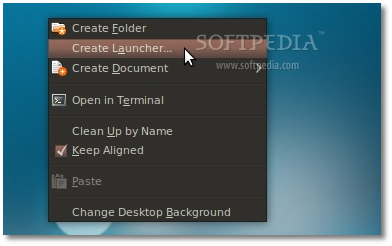
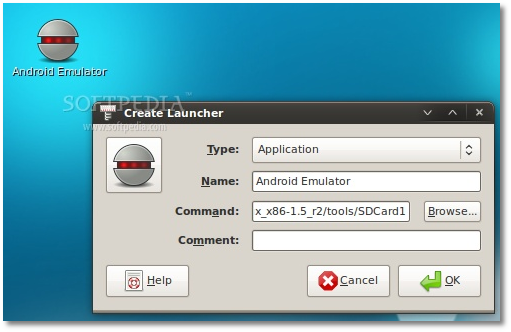
To make things a lot simpler let's create a desktop shortcut, so you won't have to open the terminal every time and type some command, in order to start the Android emulator. Therefore, right-click on your desktop and choose the "Create Launcher..." option...

Review image

In the Create Launcher window, type "Android Emulator" (without quotes) in the Name field, and paste the below line in the Command field. Optionally, you can also put a nice icon if you click the icon button on the left...

/home/YOURUSERNAME/android-sdk-linux_86/tools/emulator @softpedia

Review image

Note: Please replace YOURUSERNAME and the name of the Android Virtual Device (softpedia in our case) with your USERNAME and the name you gave to the virtual device. DO NOT REMOVE the @ sign.

Step 3 - Run applications in Android

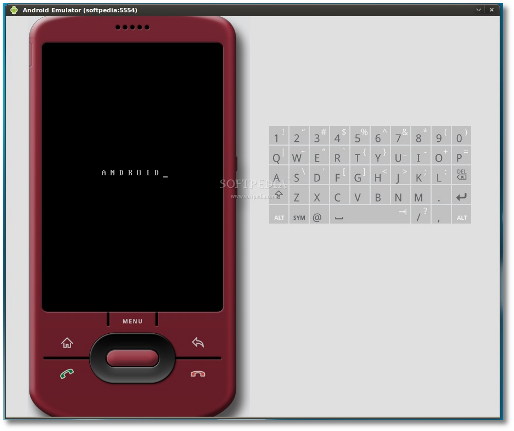
All you have to do now is double-click that desktop shortcut you've just created. The Android emulator will start. Wait for the operating system to load...

Review image

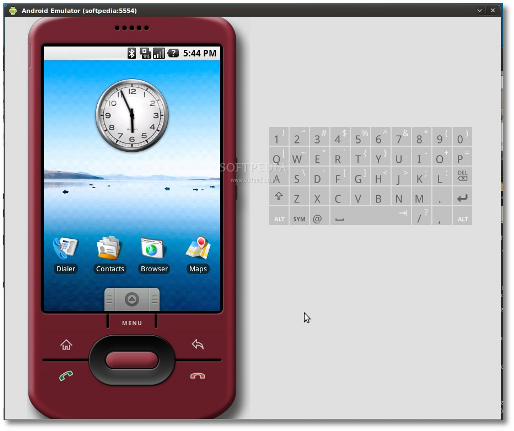
When the Android operating system has loaded, you can install and test applications. If you are used with the Android platform, you already know how to do that, but if this is your first time... follow the next instructions.

Review image
Android 1.1

Review image
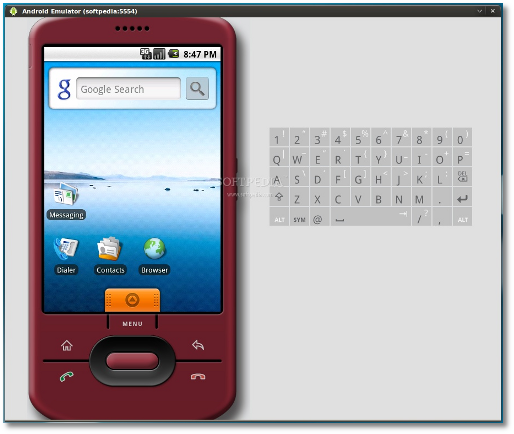
Android 1.5

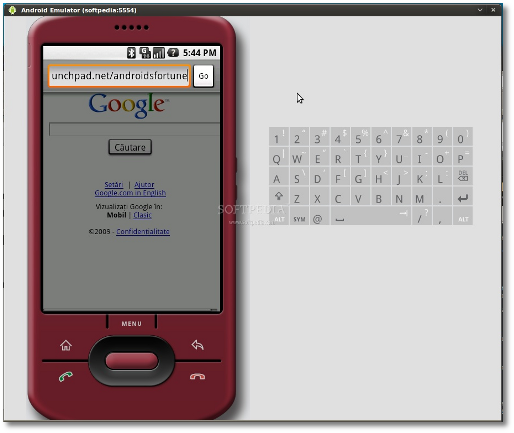
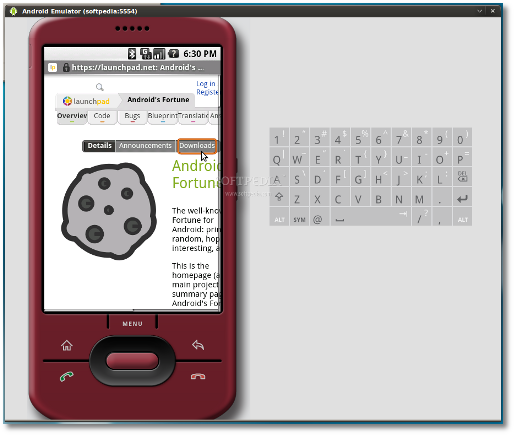
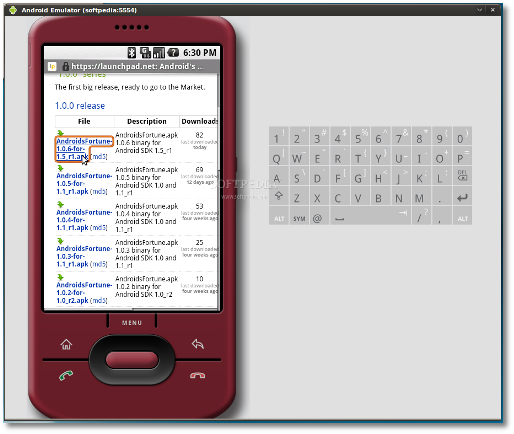
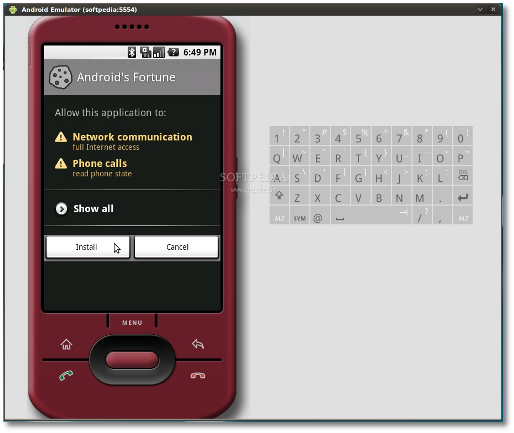
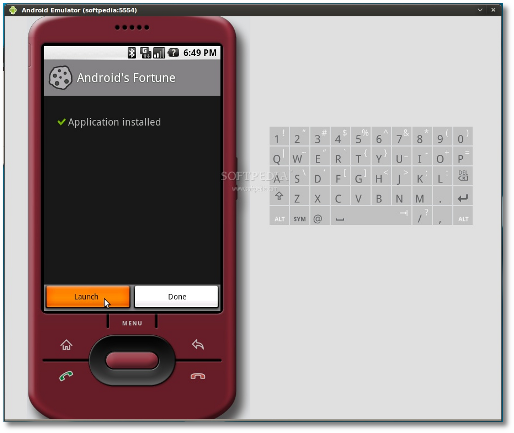
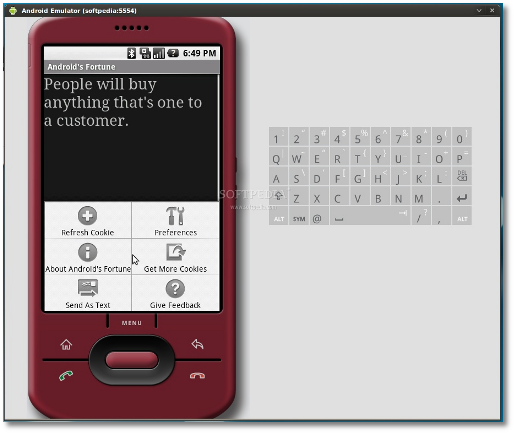
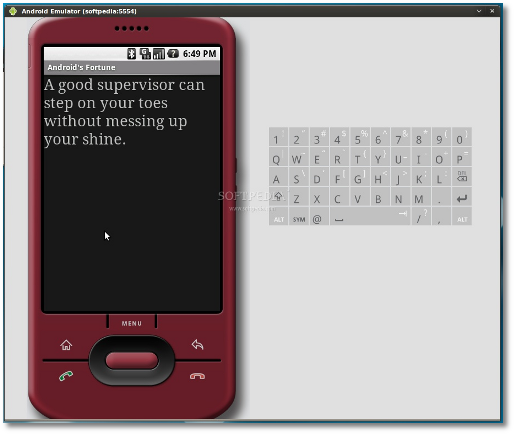
Click the Browser icon, wait for the browser to load and click Menu -> Go to URL. Enter the address from where you can download an Android application with the apk extension. For example, we've easily installed Android's Fortune from Launchpad...

Review image

Review image

Review image

Review image

Review image

Review image

Review image

...all you have to do is follow the on-screen instructions!

Have fun, and do not hesitate to comment if you want to know more about Android, or if you're stuck somewhere in the tutorial.

Thanks to :

Run Android on Your Netbook or Desktop

Would you like to try out Google’s Android OS on your netbook or desktop?  Here’s how you can run Android from a flash drive and see how fast Android can run on real hardware!
Install Android On Your Flash Drive or Memory Card
First, make sure you have a flash drive or memory card inserted into your computer with around 256MB or more storage space.  Remove any files you may need off of the drive, so you can use it to run Android on your computer.
Now you’re ready to download and setup Android on your drive.  Head over to the Android x86 download page (link below), scroll down to the StableRelease section, and click View under android-x86-1.6-r2.iso.  This will start the iso file downloading to your computer.
image
In the mean time, head over to the UNetbootin site (link below), and download it as well.
image
Once your downloads are complete, run UNetbootin.  Click the bullet beside Diskimage, then click the “ “ button and select the Android ISO file you just downloaded.  Finally, select the correct flash drive or memory card in the menu on the bottom, and click Ok.
sshot-2010-07-21-[22-57-53]
UNetbootin will now copy the files to your flash drive.  This may take a few moments, depending on your flash drive’s speed.
sshot-2010-07-21-[22-57-58]
Once it’s finished, it will ask if you wish to reboot.  If you want to go ahead and run Android, you can click Reboot; otherwise, just exit and run Android from your flash drive when you want.
sshot-2010-07-21-[22-58-11]
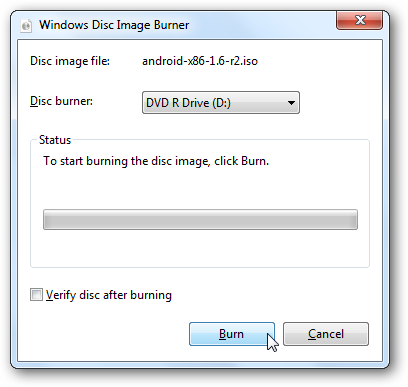
If you want to try Android on a computer that has a CD/DVD drive, you could just burn the ISO to a disk and boot from it.  Netbooks don’t have CD drives, and even on a desktop, it can be nice to not waste a CD just for this.  If you want to burn it to a disk, you can do it easily from Windows 7 or with a free program such as ImgBurn.
image
Using Android-x86 On Your Computer
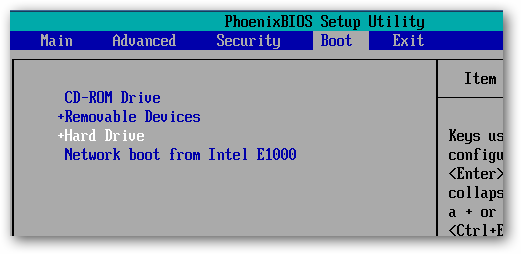
Now you’re ready to run Android on your netbook, laptop, or even a full desktop computer.  Simply reboot your computer with the USB drive, and select to boot from it.  Not all computers will automatically boot from a USB device, so you may have to press F2, F10, or another key, depending on your computer, and change the Boot options in the bios.
image
Now, when you boot from the USB drive, select Live CD – Run Android-x86 without installation.
sshot-2010-07-21-[21-34-59]
You’ll see a text prompt for a few moments as Android begins to load.
sshot-2010-07-21-[21-35-31]
Then you’ll see the Android boot screen, though we only saw it for a moment, as our computer booted really fast into Android.
image
After a couple seconds, you’ll see the Android desktop … on your netbook or computer!  You can quickly access one of the apps on the home screen, or open the menu to see more options.
image
Click and hold to open a context menu, such as to change the background or add a desktop widget.
sshot-2010-07-21-[21-52-49]
Or, press your mouse’s right button to open a menu, such as to open a new tab in the browser.
image
It works very good as a quick way to get online; the Android browser is actually quite capable for normal browsing, and worked very well in our tests.  With a 10 second or less boot time, you may enjoy using this as an alternate to Puppy Linux or other light distros for a quick way to get online securely.
sshot-2010-07-21-[21-52-13]
You can even install new applications with the included AndAppStore, though these will only be installed while this Android session is running.  If you reboot your computer, you’ll only see the default applications and settings again.
sshot-2010-07-21-[22-37-48]
Android x86 supports all of the hardware, including cameras and Wi-Fi, on several Netbooks and laptops; check the link below to see if yours is supported.  In our test, our camera wasn’t supported, and we additionally had to connect to the internet via Ethernet since it didn’t detect our Wi-Fi card.
sshot-2010-07-21-[22-38-13]
For the most part, Android was very responsive, but anything that would fade out the desktop such as opening a dialog box or a menu would run very slowly and even make the mouse feel jerky.  Additionally, we couldn’t get it to boot on our desktop with an AMD processor.  You could install Android to your hard drive, but we wouldn’t recommend it considering the limitations and issues it has.  But, it is very fun to play with from a flash drive or memory card, and you may even feel adventurous enough to try installing it.  Be warned, though; this isn’t for the weak of heart!
Conclusion
If you’re curious about how Android works and would like to try it out on a real machine, this is a great way to see how fast a mobile OS can be on a netbook or desktop.  We wish it was more stable and could actually store programs and settings on the flash drive, but it did work as a nice substitute for Puppy Linux or other light, Live CD distros.  It runs much faster on a real computer than in the emulator.  Since you’re running it from a flash drive, you don’t have to worry about messing anything up, so go ahead and try it for research or fun.
Or, if you’d rather just try out Android from inside Windows, check out our articles on How to Test Drive Android in the Android Emulator and How to Enable the Android Market in the Emulator to try out the best Android has to offer.
Links
Download Android x86
Download UNetbootin
See if Your Netbook or Laptop is Fully Supported

Thanks to:
http://www.howtogeek.com/howto/22665/run-android-on-your-netbook-or-desktop/

Tuesday, December 7, 2010

Android Debug Bridge

ADB quickview

  • Manage the state of an emulator or device
  • Run shell commands on a device
  • Manage port forwarding on an emulator or device
  • Copy files to/from an emulator or device

In this document

  1. Issuing ADB Commands
  2. Querying for Emulator/Device Instances
  3. Directing Commands to a Specific Emulator/Device Instance
  4. Installing an Application
  5. Forwarding Ports
  6. Copying Files to or from an Emulator/Device Instance
  7. Listing of adb Commands
  8. Issuing Shell Commands
  9. Enabling logcat Logging
  10. Stopping the adb Server

See also

  1. Emulator
Android Debug Bridge (adb) is a versatile tool lets you manage the state of an emulator instance or Android-powered device. It is a client-server program that includes three components:
  • A client, which runs on your development machine. You can invoke a client from a shell by issuing an adb command. Other Android tools such as the ADT plugin and DDMS also create adb clients.
  • A server, which runs as a background process on your development machine. The server manages communication between the client and the adb daemon running on an emulator or device.
  • A daemon, which runs as a background process on each emulator or device instance.
When you start an adb client, the client first checks whether there is an adb server process already running. If there isn't, it starts the server process. When the server starts, it binds to local TCP port 5037 and listens for commands sent from adb clients—all adb clients use port 5037 to communicate with the adb server.
The server then sets up connections to all running emulator/device instances. It locates emulator/device instances by scanning odd-numbered ports in the range 5555 to 5585, the range used by emulators/devices. Where the server finds an adb daemon, it sets up a connection to that port. Note that each emulator/device instance acquires a pair of sequential ports — an even-numbered port for console connections and an odd-numbered port for adb connections. For example:
Emulator 1, console: 5554
Emulator 1, adb: 5555
Emulator 2, console: 5556
Emulator 2, adb: 5557 ...
As shown, the emulator instance connected to adb on port 5555 is the same as the instance whose console listens on port 5554.
Once the server has set up connections to all emulator instances, you can use adb commands to control and access those instances. Because the server manages connections to emulator/device instances and handles commands from multiple adb clients, you can control any emulator/device instance from any client (or from a script).
The sections below describe the commands that you can use to access adb capabilities and manage the state of an emulator/device. Note that if you are developing Android applications in Eclipse and have installed the ADT plugin, you do not need to access adb from the command line. The ADT plugin provides a transparent integration of adb into the Eclipse IDE. However, you can still use adb directly as necessary, such as for debugging.

Issuing adb Commands

You can issue adb commands from a command line on your development machine or from a script. The usage is:
adb [-d|-e|-s <serialNumber>] <command> 
When you issue a command, the program invokes an adb client. The client is not specifically associated with any emulator instance, so if multiple emulators/devices are running, you need to use the -d option to specify the target instance to which the command should be directed. For more information about using this option, see Directing Commands to a Specific Emulator/Device Instance.

Querying for Emulator/Device Instances

Before issuing adb commands, it is helpful to know what emulator/device instances are connected to the adb server. You can generate a list of attached emulators/devices using the devices command:
adb devices
In response, adb prints this status information for each instance:
  • Serial number — A string created by adb to uniquely identify an emulator/device instance by its console port number. The format of the serial number is -. Here's an example serial number: emulator-5554
  • State — The connection state of the instance. Three states are supported:
    • offline — the instance is not connected to adb or is not responding.
    • device — the instance is now connected to the adb server. Note that this state does not imply that the Android system is fully booted and operational, since the instance connects to adb while the system is still booting. However, after boot-up, this is the normal operational state of an emulator/device instance.
The output for each instance is formatted like this:
[serialNumber] [state]
Here's an example showing the devices command and its output:
$ adb devicesList of devices attached 
emulator-5554  device
emulator-5556  device
emulator-5558  device
If there is no emulator/device running, adb returns no device.

Directing Commands to a Specific Emulator/Device Instance

If multiple emulator/device instances are running, you need to specify a target instance when issuing adb commands. To so so, use the -s option in the commands. The usage for the -s option is:
adb -s <serialNumber> <command> 
As shown, you specify the target instance for a command using its adb-assigned serial number. You can use the devices command to obtain the serial numbers of running emulator/device instances.
Here is an example:
adb -s emulator-5556 install helloWorld.apk
Note that, if you issue a command without specifying a target emulator/device instance using -s, adb generates an error.

Installing an Application

You can use adb to copy an application from your development computer and install it on an emulator/device instance. To do so, use the install command. With the command, you must specify the path to the .apk file that you want to install:
adb install <path_to_apk>
For more information about how to create an .apk file that you can install on an emulator/device instance, see Android Asset Packaging Tool (aapt).
Note that, if you are using the Eclipse IDE and have the ADT plugin installed, you do not need to use adb (or aapt) directly to install your application on the emulator/device. Instead, the ADT plugin handles the packaging and installation of the application for you.

Forwarding Ports

You can use the forward command to set up arbitrary port forwarding — forwarding of requests on a specific host port to a different port on an emulator/device instance. Here's how you would set up forwarding of host port 6100 to emulator/device port 7100:
adb forward tcp:6100 tcp:7100
You can also use adb to set up forwarding to named abstract UNIX domain sockets, as illustrated here:
adb forward tcp:6100 local:logd 

Copying Files to or from an Emulator/Device Instance

You can use the adb commands pull and push to copy files to and from an emulator/device instance's data file. Unlike the install command, which only copies an .apk file to a specific location, the pull and push commands let you copy arbitrary directories and files to any location in an emulator/device instance.
To copy a file or directory (recursively) from the emulator or device, use
adb pull <remote> <local>
To copy a file or directory (recursively) to the emulator or device, use
adb push <local> <remote>
In the commands, and refer to the paths to the target files/directory on your development machine (local) and on the emulator/device instance (remote).
Here's an example:
adb push foo.txt /sdcard/foo.txt

Listing of adb Commands

The table below lists all of the supported adb commands and explains their meaning and usage.
Category Command Description Comments
Options -d Direct an adb command to the only attached USB device. Returns an error if more than one USB device is attached.
-e Direct an adb command to the only running emulator instance. Returns an error if more than one emulator instance is running.
-s  Direct an adb command a specific emulator/device instance, referred to by its adb-assigned serial number (such as "emulator-5556"). If not specified, adb generates an error.
General devices Prints a list of all attached emulator/device instances. See Querying for Emulator/Device Instances for more information.
help Prints a list of supported adb commands.  
version Prints the adb version number.  
Debug logcat [] [] Prints log data to the screen.  
bugreport Prints dumpsys, dumpstate, and logcat data to the screen, for the purposes of bug reporting.  
jdwp Prints a list of available JDWP processes on a given device. You can use the forward jdwp: port-forwarding specification to connect to a specific JDWP process. For example:
adb forward tcp:8000 jdwp:472
jdb -attach localhost:8000
Data install  Pushes an Android application (specified as a full path to an .apk file) to the data file of an emulator/device.  
pull   Copies a specified file from an emulator/device instance to your development computer.  
push   Copies a specified file from your development computer to an emulator/device instance.  
Ports and Networking forward   Forwards socket connections from a specified local port to a specified remote port on the emulator/device instance. Port specifications can use these schemes:
  • tcp:
  • local:
  • dev:
  • jdwp:
ppp  [parm]... Run PPP over USB.
  • — the tty for PPP stream. For example dev:/dev/omap_csmi_ttyl.
  • [parm]... — zero or more PPP/PPPD options, such as defaultroute, local, notty, etc.
Note that you should not automatically start a PPP connection.

Scripting get-serialno Prints the adb instance serial number string. See Querying for Emulator/Device Instances for more information.
get-state Prints the adb state of an emulator/device instance.
wait-for-device Blocks execution until the device is online — that is, until the instance state is device. You can prepend this command to other adb commands, in which case adb will wait until the emulator/device instance is connected before issuing the other commands. Here's an example:
adb wait-for-device shell getprop
Note that this command does not cause adb to wait until the entire system is fully booted. For that reason, you should not prepend it to other commands that require a fully booted system. As an example, the install requires the Android package manager, which is available only after the system is fully booted. A command such as
adb wait-for-device install <app>.apk
would issue the install command as soon as the emulator or device instance connected to the adb server, but before the Android system was fully booted, so it would result in an error.
Server start-server Checks whether the adb server process is running and starts it, if not.  
kill-server Terminates the adb server process.  
Shell shell Starts a remote shell in the target emulator/device instance. See Issuing Shell Commands for more information.
shell [] Issues a shell command in the target emulator/device instance and then exits the remote shell.

Issuing Shell Commands

Adb provides an ash shell that you can use to run a variety of commands on an emulator or device. The command binaries are stored in the file system of the emulator or device, in this location:
/system/bin/...
You can use the shell command to issue commands, with or without entering the adb remote shell on the emulator/device.
To issue a single command without entering a remote shell, use the shell command like this:
adb [-d|-e|-s {<serialNumber>}] shell <shellCommand>
To drop into a remote shell on a emulator/device instance, use the shell command like this:
adb [-d|-e|-s {<serialNumber>}] shell
When you are ready to exit the remote shell, use CTRL+D or exit to end the shell session.
The sections below provide more information about shell commands that you can use.

Examining sqlite3 Databases from a Remote Shell

From an adb remote shell, you can use the sqlite3 command-line program to manage SQLite databases created by Android applications. The sqlite3 tool includes many useful commands, such as .dump to print out the contents of a table and .schema to print the SQL CREATE statement for an existing table. The tool also gives you the ability to execute SQLite commands on the fly.
To use sqlite3, enter a remote shell on the emulator instance, as described above, then invoke the tool using the sqlite3 command. Optionally, when invoking sqlite3 you can specify the full path to the database you want to explore. Emulator/device instances store SQLite3 databases in the folder /data/data//databases/.
Here's an example:
$ adb -s emulator-5554 shell# sqlite3 /data/data/com.example.google.rss.rssexample/databases/rssitems.db
SQLite version 3.3.12
Enter ".help" for instructions.... enter commands, then quit...
sqlite> .exit 
Once you've invoked sqlite3, you can issue sqlite3 commands in the shell. To exit and return to the adb remote shell, use exit or CTRL+D.

UI/Application Exerciser Monkey

The Monkey is a program that runs on your emulator or device and generates pseudo-random streams of user events such as clicks, touches, or gestures, as well as a number of system-level events. You can use the Monkey to stress-test applications that you are developing, in a random yet repeatable manner.
The simplest way to use the monkey is with the following command, which will launch your application and send 500 pseudo-random events to it.
$ adb shell monkey -v -p your.package.name 500
For more information about command options for Monkey, see the complete UI/Application Exerciser Monkey documentation page.

Other Shell Commands

The table below lists several of the adb shell commands available. For a complete list of commands and programs, start an emulator instance and use the adb -help command.
adb shell ls /system/bin
Help is available for most of the commands.
Shell Command Description Comments
dumpsys Dumps system data to the screen. The Dalvik Debug Monitor Service (DDMS) tool offers integrated debug environment that you may find easier to use.
dumpstate Dumps state to a file.
logcat []... []... Enables radio logging and prints output to the screen.
dmesg Prints kernel debugging messages to the screen.
start Starts (restarts) an emulator/device instance.  
stop Stops execution of an emulator/device instance.  

Enabling logcat Logging

The Android logging system provides a mechanism for collecting and viewing system debug output. Logs from various applications and portions of the system are collected in a series of circular buffers, which then can be viewed and filtered by the logcat command.

Using logcat Commands

You can use the logcat command to view and follow the contents of the system's log buffers. The general usage is:
[adb] logcat [<option>] ... [<filter-spec>] ...
The sections below explain filter specifications and the command options. See Listing of logcat Command Options for a summary of options.
You can use the logcat command from your development computer or from a remote adb shell in an emulator/device instance. To view log output in your development computer, you use
$ adb logcat
and from a remote adb shell you use
# logcat

Filtering Log Output

Every Android log message has a tag and a priority associated with it.
  • The tag of a log message is a short string indicating the system component from which the message originates (for example, "View" for the view system).
  • The priority is one of the following character values, ordered from lowest to highest priority:
    • V — Verbose (lowest priority)
    • D — Debug
    • I — Info
    • W — Warning
    • E — Error
    • F — Fatal
    • S — Silent (highest priority, on which nothing is ever printed)
You can obtain a list of tags used in the system, together with priorities, by running logcat and observing the first two columns of each message, given as /.
Here's an example of logcat output that shows that the message relates to priority level "I" and tag "ActivityManager":
I/ActivityManager(  585): Starting activity: Intent { action=android.intent.action...}
To reduce the log output to a manageable level, you can restrict log output using filter expressions. Filter expressions let you indicate to the system the tags-priority combinations that you are interested in — the system suppresses other messages for the specified tags.
A filter expression follows this format tag:priority ..., where tag indicates the tag of interest and priority indicates the minimum level of priority to report for that tag. Messages for that tag at or above the specified priority are written to the log. You can supply any number of tag:priority specifications in a single filter expression. The series of specifications is whitespace-delimited.
Here's an example of a filter expression that suppresses all log messages except those with the tag "ActivityManager", at priority "Info" or above, and all log messages with tag "MyApp", with priority "Debug" or above:
adb logcat ActivityManager:I MyApp:D *:S
The final element in the above expression, *:S, sets the priority level for all tags to "silent", thus ensuring only log messages with "View" and "MyApp" are displayed. Using *:S is an excellent way to ensure that log output is restricted to the filters that you have explicitly specified — it lets your filters serve as a "whitelist" for log output.
The following filter expression displays all log messages with priority level "warning" and higher, on all tags:
adb logcat *:W
If you're running logcat from your development computer (versus running it on a remote adb shell), you can also set a default filter expression by exporting a value for the environment variable ANDROID_LOG_TAGS:
export ANDROID_LOG_TAGS="ActivityManager:I MyApp:D *:S"
Note that ANDROID_LOG_TAGS filter is not exported to the emulator/device instance, if you are running logcat from a remote shell or using adb shell logcat.

Controlling Log Output Format

Log messages contain a number of metadata fields, in addition to the tag and priority. You can modify the output format for messages so that they display a specific metadata field. To do so, you use the -v option and specify one of the supported output formats listed below.
  • brief — Display priority/tag and PID of originating process (the default format).
  • process — Display PID only.
  • tag — Display the priority/tag only.
  • thread — Display process:thread and priority/tag only.
  • raw — Display the raw log message, with no other metadata fields.
  • time — Display the date, invocation time, priority/tag, and PID of the originating process.
  • long — Display all metadata fields and separate messages with a blank lines.
When starting logcat, you can specify the output format you want by using the -v option:
[adb] logcat [-v <format>]
Here's an example that shows how to generate messages in thread output format:
adb logcat -v thread
Note that you can only specify one output format with the -v option.

Viewing Alternative Log Buffers

The Android logging system keeps multiple circular buffers for log messages, and not all of the log messages are sent to the default circular buffer. To see additional log messages, you can start logcat with the -b option, to request viewing of an alternate circular buffer. You can view any of these alternate buffers:
  • radio — View the buffer that contains radio/telephony related messages.
  • events — View the buffer containing events-related messages.
  • main — View the main log buffer (default)
The usage of the -b option is:
[adb] logcat [-b <buffer>]
Here's an example of how to view a log buffer containing radio and telephony messages:
adb logcat -b radio

Viewing stdout and stderr

By default, the Android system sends stdout and stderr (System.out and System.err) output to /dev/null. In processes that run the Dalvik VM, you can have the system write a copy of the output to the log file. In this case, the system writes the messages to the log using the log tags stdout and stderr, both with priority I.
To route the output in this way, you stop a running emulator/device instance and then use the shell command setprop to enable the redirection of output. Here's how you do it:
$ adb shell stop
$ adb shell setprop log.redirect-stdio true
$ adb shell start
The system retains this setting until you terminate the emulator/device instance. To use the setting as a default on the emulator/device instance, you can add an entry to /data/local.prop on the device.

Listing of logcat Command Options

Option Description
-b  Loads an alternate log buffer for viewing, such as event or radio. The main buffer is used by default. See Viewing Alternative Log Buffers.
-c Clears (flushes) the entire log and exits.
-d Dumps the log to the screen and exits.
-f  Writes log message output to . The default is stdout.
-g Prints the size of the specified log buffer and exits.
-n  Sets the maximum number of rotated logs to . The default value is 4. Requires the -r option.
-r  Rotates the log file every of output. The default value is 16. Requires the -f option.
-s Sets the default filter spec to silent.
-v  Sets the output format for log messages. The default is brief format. For a list of supported formats, see Controlling Log Output Format.

Stopping the adb Server

In some cases, you might need to terminate the adb server process and then restart it. For example, if adb does not respond to a command, you can terminate the server and restart it and that may resolve the problem.
To stop the adb server, use the kill-server. You can then restart the server by issuing any adb command.

Thanks to:
http://developer.android.com/guide/developing/tools/adb.html
Crude oil price - truth revealing in Indian oil price

Refineries can obtain from 42 US gallon barrels of crude oil the following fuels (among a total of 44 gallons of by-products):
- 20 gallons of gasoline (petrol)
- 7 gallons of diesel
So the conversion rate of crude oil to gasoline is 47.6%. To answer your question, 0.48 liter of gasoline is produced from 1 liter of crude oil


1 barrel of oil is known to be equal to 158.987295 liters.

One Barrel of Crude Oil makes almost 19 or 19.5 gallons of Gasoline, which when gets converted it makes 73.8 liters of petrol/gasoline

Crude oil price - 158.987295 litres  at  $90 (If one $ is Rs 45 then 90$ is Rs 4050)
For one litre crude oil - 4050 / 158.98 = Rs 25.47(Real price of the crude oil in the world )

- 20 gallons of gasoline (petrol) - (20 * 3.785 = 75.7   litres)
- 7 gallons of diesel             - (7 * 3.785  = 26.495 litres )

Actual price petrol in India - one litre Rs 56
Actual price diesel in India - one litre Rs 40

75.7   * 56   =  Rs 4239
26.495 * 40 =  Rs 1059
Other produ =  Rs 1000
Total            =  Rs 6298

So for one litre crude oil price in india is Rs 6298/158.98litres = Rs 39.61( 75% hike of the real world crude oil price)
We are living in a country which makes a fake hike of real product price.
The prices mentioned here is a approximate price, it may differ with actual dollar variations and crude oil price variations. but the my calculations are right.


For reference :
1 barrel of oil is known to be equal to 158.987295 liters.
one US gallon = 3.78541178 lit

101 Email Etiquette Tips

It is important that whether for business or personal use that you follow the basics of email etiquette. This document covers for you the top tips for email etiquette that everyone needs to be aware of and follow. By doing so you will be a joy to communicate with while being perceived as a caring and intelligent human being.

    Sending Emails

  1. Make sure your e-mail includes a courteous greeting and closing. Helps to make your e-mail not seem demanding or terse.
  2. Address your contact with the appropriate level of formality and make sure you spelled their name correctly.
  3. Spell check - emails with typos are simply not taken as seriously.
  4. Read your email out loud to ensure the tone is that which you desire. Try to avoid relying on formatting for emphasis; rather choose the words that reflect your meaning instead. A few additions of the words "please" and "thank you" go a long way!
  5. Be sure you are including all relevant details or information necessary to understand your request or point of view. Generalities can many times causing confusion and unnecessary back and forths.
  6. Are you using proper sentence structure? First word capitalized with appropriate punctuation? Multiple instances of !!! or ??? are perceived as rude or condescending.
  7. If your email is emotionally charged, walk away from the computer and wait to reply. Review the Sender's email again so that you are sure you are not reading anything into the email that simply isn't there.
  8. If sending attachments, did you ask first when would be the best time to send? Did you check file size to make sure you don't fill the other side's inbox causing all subsequent e-mail to bounce?
  9. Refrain from using the Reply to All feature to give your opinion to those who may not be interested. In most cases replying to the Sender alone is your best course of action.
  10. Make one last check that the address or addresses in the To: field are those you wish to send your reply to.
  11. Be sure your name is reflected properly in the From: field. Jane A. Doe (not jane, jane doe or JANE DOE).
  12. Type in complete sentences. To type random phrases or cryptic thoughts does not lend to clear communication.
  13. Never assume the intent of an email. If you are not sure -- ask so as to avoid unnecessary misunderstandings.
  14. Just because someone doesn't ask for a response doesn't mean you ignore them. Always acknowledge emails from those you know in a timely manner.
  15. Be sure the Subject: field accurately reflects the content of your email.
  16. Don't hesitate to say thank you, how are you, or appreciate your help!
  17. Keep emails brief and to the point. Save long conversations for the old fashioned telephone.
  18. Always end your emails with "Thank you," "Sincerely," "Take it easy," "Best regards" - something!
  19. Formatting Emails

  20. Do not type in all caps. That's yelling or reflects shouting emphasis.
  21. If you bold your type, know you are bolding your statement and it will be taken that way by the other side - X10!
  22. Do not use patterned backgrounds. Makes your email harder to read.
  23. Stay away from fancy-schmancy fonts -- only the standard fonts are on all computers.
  24. Use emoticons sparingly to ensure your tone and intent are clear.
  25. Typing your emails in all small case gives the perception of lack of education or laziness.
  26. Refrain from using multiple font colors in one email. It makes your email harder to view and can add to your intent being misinterpreted.
  27. Use formatting sparingly. Instead try to rely on choosing the most accurate words possible to reflect your tone and avoid misunderstandings in the process.
  28. Email Attachments

  29. When sending large attachments, always "zip" or compress them before sending.
  30. Never send large attachments without notice! Always ask what would be the best time to send them first.
  31. Learn how to resample or resize graphics to about 600 pixels in width before attaching them to an email. This will greatly reduce download time.
  32. Never open an attachment from someone you don't know.
  33. Be sure your virus, adware and spyware programs are up to date and include scanning of your emails and attachments both incoming and outgoing.
  34. It is better to spread multiple attachments over several emails rather than attaching them all to one email to avoid clogging the pipeline.
  35. Make sure the other side has the same software as you before sending attachments or they may not be able to open your attachment. Use PDF when possible.
  36. To, From, CC, BCc, RR, Subject:

  37. Only use Cc: when it is important for those you Cc: to know about the contents of the email. Overuse can cause your emails to be ignored.
  38. Don't use Return Receipt (RR) on every single email. Doing so is viewed as intrusive, annoying and can be declined by the other side anyway.
  39. Include addresses in the To: field for those who you would like a response from.
  40. Include addresses in the Cc: field for those who you are just FYI'ing.
  41. Make sure your name is displayed properly in the From: field.
  42. Remove addresses from the To:, CC; and BCc: field that don't need to see your reply.
  43. Always include a brief Subject. No subject can get your email flagged as spam.
  44. Think about your motives when adding addresses to To:, CC:, BCc. Use your discretion.
  45. Never expose your friend's or contact's email address to strangers by listing them all in the To: field. Use BCc:!
  46. Make sure when using BCc: that your intentions are proper. To send BCc: copies to others as a way of talking behind someone's back is inconsiderate.
  47. Email Forwarding

  48. Don't forward emails that say to do so--no matter how noble the cause may be. Most are hoaxes or hooey and may not be appreciated by those you send to.
  49. If someone asks you to refrain from forwarding emails they have that right and you shouldn't get mad or take it personally.
  50. When forwarding email, if you cannot take the time to type a personal comment to the person you are forwarding to--then don't bother.
  51. Don't forward anything without editing out all the forwarding >>>>, other email addresses, headers and commentary from all the other forwarders.
  52. If you must forward to more than one person, put your email address in the TO: field and all the others you are sending to in the BCc: field to protect their email address from being published to those they do not know. This is a serious privacy issue!
  53. Be careful when forwarding email on political or controversial issues. The recipient may not appreciate your POV.
  54. Email and Perception, Privacy, Copyright

  55. Choose your email address wisely. It will determine, in part, how you are perceived.
  56. Try not to make assumptions when it comes to email. Always ask for clarification before you react.
  57. Posting or forwarding of private email is copyright infringement -- not to mention downright rude. You need permission from the author first!
  58. Even though it isn't right; emails are forwarded to others. Keep this in mind when typing about emotional or controversial topics.
  59. When there is a misunderstanding by email, don't hesitate to pick up the old fashioned telephone to work things out!
  60. Know that how you type, and the efforts you make or don't make will indicate what is important to you and if you are an educated courteous person.
  61. If you forward an email that turns out to be a hoax, have the maturity to send an apology follow up email to those you sent the misinformation to.
  62. When filling out a contact form on a Web site, do so carefully and with clarity so your request is taken seriously.
  63. If a friend puts your e-mail address in the To: field with others you do not know, ask them to no longer expose your address to strangers without your permission.
  64. Business Email

  65. Think of your business email as though it was on your business letterhead and you'll never go wrong!
  66. If you cannot respond to an email promptly, at the very least email back confirming your receipt and when the sender can expect your response.
  67. Emailing site owners about your product or service through the site form is still spam. Ask them if they want more info first!
  68. When replying to emails always respond promptly and edit out unnecessary information from the post you are responding to.
  69. Formality is in place as a courtesy and reflects respect. Assume the highest level of formality with new email contacts until the relationship dictates otherwise. Refrain from getting too informal too soon in your email communications.
  70. Never send anyone an email they need to unsubscribe from when they didn't subscribe in the first place!
  71. Be very careful how you use Reply to All and Cc: in a business environment. Doing so for CYA or to subtlety tattle can backfire and have your viewed as petty or insecure.
  72. When replying to an email with multiple recipients noted in the To: or Cc: fields, remove the addresses of those who your reply does not apply to.
  73. Never send business attachments outside of business hours and confirm that the format in which you can send can be opened by the other side.
  74. IM, Blackberry

  75. With IM and Chat, try not to be overly cryptic or your meaning can be misread.
  76. Use Instant Messaging (IM) for casual topics or informational briefs. IM is not the place for serious topics or confrontational issues.
  77. Start by always asking if the person you are IMing is available and if it is a good time to chat. Refrain from IMing during meetings or when your attention is required.
  78. Practice communicating briefly and succinctly.
  79. Use IM for casual topics or informational briefs. Serious topics are not for IM.
  80. IMing is not an excuse to forget your grade school education.
  81. If you are not a smooth multi-tasker, do not continue multiple IM sessions and leave folks hanging while you communicate with others.
  82. Learn how to use the features of your IM program. Specifically your "busy" and "away" message features.
  83. Never IM under an alias to take a peek at friends' or associates' activities.
  84. Take into consideration who you are communicating with to determine the acronyms and emoticons that should be used - if at all.
  85. Email and Blogs, Forums, Message Boards

  86. Keep in mind when in newsgroups or message boards that you are in a global arena. Read the charters and rules - before you post.
  87. When discussions get out of control; don't stoop to name-calling or profanities. You are better than that!
  88. Keep your signature file to no more than 4-5 lines.
  89. Keep commercialism to no more than a link at the end of your comment or contribution.
  90. Stay on topic and discuss issues only relative to the thread/topic in question.
  91. If new to the message board, "lurk" for awhile to get a feel for the community and personalities of the regulars before you post.
  92. Never give out personal information or specifics to your location on message boards.
  93. Keep in mind there will always be differences of opinion. Try to remain objective and not personalize issues.
  94. Don't fall for trolls. Trolls are folks who will post rude comments just to get a rise out of everyone.
  95. Be sure to down edit, or remove any part of the post you are replying to that is no longer necessary to the ongoing conversation.
  96. Email Considerations...

  97. Before getting upset because you perceive someone didn't respond, check to see if their reply was inadvertently deleted or sent to your Trash or Junk folder.
  98. With emotionally charged emails, wait until the next morning to see if you feel the same before clicking Send.
  99. Feel free to modify the Subject: field to more accurately reflect a conversation's direction.
  100. When it comes to your email communications, know who you can trust; trust only those you know.
  101. Take the time to review each email before clicking Send to ensure your message is clear and you are relaying the tone that you desire.
  102. Never use an old email to hit reply and start typing about an entirely new topic.
  103. Regardless of how noble a forwarded email may be, don't just forward without investigating its authenticity @ Snopes.com.
  104. Always add the email addresses of Web sites and new contacts immediately to your approved senders or address book so they get through Spam filters.
  105. Before completing a Web site's Contact form; make an effort to review the site to be sure the information you seek is not already available.
  106. Take a quick look at the e-mails in your Trash before you delete them just in case a good e-mail landed there by mistake.
  107. If any email states to forward to all your friends, or just 5 people -- do everyone a favor and just hit delete!
  108. Don't mass e-mail people who didn't ask to be on your personal "mailing list".
  109. Double check that your adware, spyware and virus programs are set to automatically update at least once each week so the software knows what to protect you from.
  110. And finally... Type unto others as you would have them type unto you! Thanks to : http://www.101emailetiquettetips.com/index.html

SVN vs CVS

This comparison is based on the following web
http://www.pushok.com/soft_svn_vscvs.php

Compared item CVS SVN
1 Repository format CVS is based on RCS files of versions control. Each file connected to CVS is an ordinary file containing some additional information. It is quite natural that the tree of these files repeats the file tree in the local directory. Thus, with CVS you should not be anxious about data loss, and you can easily correct RCS files if necessary. The basis of SVN is a relational database (BerkleyDB) either set of binary files (FS_FS). On one hand, this settles many problems (for example, concurrent access through the file share) and enables new functionalities (for example, transactions at operations performance). However, on the other hand, data storage now is not transparent, or at least is not available for user interference. That is why the utilities for "curing" and "recovering" of the repository (database) are provided.
2 Speed CVS works more slowly. As a whole, due to some constructive solutions, SVN really works faster than CVS. It transmits less information through the network and supports more operations for offline mode. However, there is the reverse of the medal. Speed increasing is achieved basically at the expense of full backup of all work files on your computer.
3 Tags & Branches (!!! IMPORTANT) To our point of view, these are implemented properly. The SVN developers assert with pride that they have got rid of 3 measurements by working with tags and branches. In practice it means that they have substituted both concepts for a capability of copying file(s) or directories within the repository with saving the history of changes. That is, both tag creation and branch creation are substituted for copying within the repository. From the SVN developers' viewpoint, this is very elegant decision, which simplifies one's life. However, we think that there is nothing to be proud of. As for branches, everything is not so bad, now branches are nothing but separate folders in the repository, which earlier have had some interconnection. As for tags, everything is much worse. Now you cannot tag a code, this function is simply missing. Certainly, to some extent this is compensated by universal numbering of files in SVN, that is, the whole repository gets the version number, but not each separate file. However, we suppose you will not deny that it is not very convenient to store a four- digit number instead of a symbolic tag.
4 Meta data CVS allows to store of only files and nothing else. SVN allows to "attach" to a file any number of all possible named attributes. Excellent functionality, but it is not quite clear what it is necessary for.
5 File types CVS was initially intended for text data storage. That is why storage of other files (binary, unicode) is not trivial and requires special information, as well as adjustments on either server or client sides. SVN manipulates all the file types and does not require your instructions.
6 Rollback CVS allows to rollback any commit in the repository, even if this may require some time (each file should be processed independently) SVN does not allow rollback of commit. Authors suggest copy good repository state to the end of trunk to overwrite bad commit. However bad commit itself will remain in repository.
7 Transactions In CVS the support of transactions by the principle "all or nothing" is completely absent. For example, when you checkin several files (transfer them to the server), it is possible that the operation will be completed only for some of these files, and will not be completed for the rest (due to conflicts, for example). As a rule, it is sufficient to correct the situation and to repeat the operation for the remaining files (not for all files). That is, the files will be checked in in two steps. No cases of the repository damage due to absence of this functionality were observed. SVN does support transactions by the principle "all or nothing". Probably this is an advantage of the system.
8 Availability Presently CVS is supported everywhere where you might need it. SVN not yet so widly used, as the result there are places where it support still not implemented.
9 Internal architecture and code. CVS is very old system. Initially CVS was written as bunch of scripts around RCS executable. Later this packaged into single executable. But internal structure of code is poor and have lots of historical fixes. Till now there was several attempts to rewrite CVS from scratch, but as it is known without success. We, personally, tried to extract client code to make better integration between plug-in and CVS, but without success. Right now we not think that CVS may grows too much in its functionality. Subversion authors really spent some time on internal SVN architecture. Still not know how good are some decisions they make. But one is clear, the code is well expandable, and future improvements are coming.
Total score 4 5

Version Control with Subversion - Useful SVN Commands

Contents

Basic SVN commands

Checking out projects

You need to know the urls of the components you want to checkout. Then you would do either of the following:
svn checkout url
svn co url
The above will check it all out into a default folder name. For instance:
svn checkout http://svn.greenstone.org/greenstone3/trunk
will check out Greenstone 3 into a folder called trunk in the current directory.
You can alternatively provide an optional folder name at the end of the command, to check the contents out into:
svn checkout http://svn.greenstone.org/greenstone3/trunk greenstone3
This will check out Greenstone 3 into a folder called greenstone3.

svn update and revert

An svn update merges the repository's changes with the local changed code, or shows places where conflicts have arisen (conflicts are shown with a C next to the files you tried to update). If someone else had committed changes to the repository and if these did not conflict with the changes in your own version, the svn update would show up a "G", not a "C". To deal with conflicts (C), see a later section.
  • To update the local file(s) with just the changes made in the repository, do an "svn update":
> svn update   ... 
  • To overwrite local file(s) with the one in the repository, do an "svn revert"--you would do this if you want to go back to the version of the file in the repository (you will lose all changes you had made since the last commit):
> svn revert  ... 
You can update an entire directory (and subdirectories) by moving into that directory and typing:
> svn update

svn diff

Note that svn diff does not connect to the repository! It compares your file against the file you had downloaded, not the file as it exists at the moment in the svn repository.
To find out what changes you've made to a greenstone source file:
> cd 
 > svn diff 
e.g.
 > svn diff util.pm

Committing files

Perform an svn diff it to look over the changes made since you last updated the file. Then svn update the file, perform the svn diff on the updated file, then svn commit it with a message:
> svn diff 
Will show you the changes you've made since you last did an svn update on the file.
> svn update 
It will merge changes made to the file in the repository with the changes you have on your machine. Your own changes take precedence and these are preserved. However, conflicts may arise if any of the lines that have been modified on your machine have been changed in the repository since you last checked it out/svn-updated it.
> svn diff 
This diff now shows up the differences between your current file and what's there now in the repository. Check that only the new code you have added is the sum total of the differences.
> svn commit - m "message" 
Where the message string is one that explains what changes have been made, why you are committing the file or what purpose a new file serves.
To perform these svn operations on more more than 1 file in one go, separate them by spaces:
> svn diff   
> svn update   
> svn diff   
> svn commit - m "message"   

Adding a new file to the repository

How to add a file (not for creating new folders in the svn repository):
svn add 
svn commit -m "This new file will do something useful" 
You can add more than one file at a time:
svn add   
svn commit -m "These new files work together to add some extra functionality"   

Deleting a file from the repository

To remove a file from the repository, you need to give it the url of the file in the repository:
svn remove -m "I deleted this file for a reason" http://svn.greenstone.org/....../thefile.ext
Aliases for svn remove are "svn delete" and "svn rm". If more than one file needs to be removed, you need to perfom the svn remove operation for each file one after another. (You can't remove several files from the repository at the same time in one line.)

Helpful svn commands

> svn info
> svn switch
> svn status
If you do an "svn status" in a folder, it recursively lists all the Modified (M), Deleted (D) and Added (A) files. It will also show up files that are in conflict (C) and those about which svn does not know (?). To see what modifications were made to individual files marked with an M, you'd do an "svn diff":
> svn diff 
> svn help
> svn help [item]
 eg. svn help status
The last gives instructions on how to use an svn command. For example:
> svn help commit
Will tell you that to commit changes, you do "svn commit [path] --message ""


Conflicts and resolving them

  • If, when doing an "svn status" of a folder you find any files marked with a C, then it means such files are in conflict with their corresponding versions in the svn repository.
  • Doing an "svn update" may indicate files are in conflict as well. If you performed an "svn update" on some files (or on a folder) and one or more came up with the status C then you have a conflict. It means that changes to the same file on the same lines had been committed to the svn repository as what you have been working on. The update could not successfully merge the corresponding lines as it didn't know which lines to keep and which to overwrite: the lines are in conflict.
If you ever encounter a file in conflict and you view it in an editor, you will see that conflicted lines will be marked with ===== and >>>>. Both the changes you made and the conflicting changes in the repository will be embedded inside such special marks. (If you had done an "svn update" on files that turned out to conflict, the action would have created a couple of additional versions of the file: conflict-filename.mine and conflict-filename.. The first is your local version containing the changes you made. The second is the file as it is in the svn repository.)

To resolve conflicts in a file marked with a C

  1. Open up the file that's in conflict in an editor.
  2. Search for all occurrences of >>> or ===. Each occurrence marks a conflicted section and needs to be resolved.
  3. Deal with marked sections as appropriate: decide which parts you want to keep, which should be removed or how to combine (the best of) both.
  4. Once you've finished editing out the conflicts in the file, you have to set the file's status to resolved for it to be up to date (and updateable with svn):
svn resolved 
If you now try svn update on the file, it should no longer be marked as being in conflict.

Special SVN operations

svn log and annotate

  • To find out the list of changes made to code in a file:
>svn annotate 
The above will list the code changes with NUMBERS in front of each line. For example,
svn annotate GathererProg.java | less
  • To find the message added into the log for making a change
>svn log 
That will give all the messages for all the code changes. For example,
svn log GathererProg.java | less
  • Or, if you know the specific line of change for which you want to understand the reasoning or view the log message:
>svn log -rNUMBER 
For example:
svn log -r10242 GathererProg.java
  • If you want to find all the files in a particular commit and the log message for them:
svn -v log http://svn.greenstone.org -r18201
Example output:
------------------------------------------------------------------------
r18201 | ak19 | 2008-12-15 14:10:06 +1300 (Mon, 15 Dec 2008) | 1 line
Changed paths:
   M /gsdl/trunk/perllib/unicode.pm

When associated files are renamed with the URLencoded versions of their original filenames,
the spaces are no longer URL encoded, as this conflicted with mp3, wmv and possibly other
media file formats being opened in external or browser-embedded apps
------------------------------------------------------------------------

Creating a new project in the svn repository

You'd do this if you want to put your program, stored only on your machine at the moment, onto the svn repository.
The program folder on your harddrive, called "my_program" for instance, may contain:
  • all the directories (e.g. src, lib, bin) and
  • loose files (e.g. build.xml and *.bat, *.sh scripts).
If you want to put this project folder into the repository, inside http://svn.greenstone.org/other-projects/trunk/ then you would type the following in your x-term:
cd my_program
svn import -m "my message" . http://svn.greenstone.org/other-projects/trunk/my_program
That will put your folder and its contents into the svn repository inside a similarly named folder. Now, we need to check out our own svn-managed copy: Move up out of the local my_program directory and make a back-up copy of original program folder, just in case:
3. cd .. 
4. mv my_program my_program.bak
Finally, checkout the a copy of the program from the svn repository, that will be stored on your machine in my_program:
5. svn co http://svn.greenstone.org/other-projects/trunk/my_program
Your program folder is just as before, except that it's now managed with svn.

Copying an older revision of a file or folder back into the current svn revision

If you've accidentally deleted an svn repository folder, such as "my_program", and want to bring it back (the older version is, after all, stored in the svn repository):
svn copy -r  from-svn-url to-svn-url -m "message"
The revision version number you want to copy should be one where the folder (or file) you accidentally wiped out still exists. For example:
svn copy -r 15315 http://svn.greenstone.org/other-projects/trunk/my_program http://svn.greenstone.org/other-projects/trunk/my_program -m "Accidental delete restored"
The above copies the folder of revision version 15315 at http://svn.greenstone.org/other-projects/trunk/my_program into the same url at the current revision/head.

Checking out an older revision from SVN

a. In general, you would do:
/my/local/path/>svn update -r {2008-04-26}
If there were conflicts, delete everyting and checkout the older version:
/my/local/path/>svn co -r {2007-10-01} http://svn.greenstone.org/greenstone3/trunk .
Comparing versions: comparing current folder contents with contents of an older revision:
/my/local/path>svn diff -r {2008-04-26} .
b. Checking out an older revision of Greenstone 3 is a special situation. For this you would do:
ant  -Dbranch.revision=
eg. ant prepare -Dbranch.revision=15190
This will do an ant prepare/ant install/ant command using the revision number specified. Usually, you'd want to do an "ant prepare" with the revision flag. (And thereafter compile your greenstone 3 up again with a normal "ant install".)

Changing an svn property

You may want to do this if a regular text file in the svn repository is marked as a binary file and therefore won't let you do an "svn diff" to compare the text contents.
An example situation:
/my/full/path>svn diff file.ext
Output:
Index: file.ext
___________________________________________________________________
Cannot display: file marked as a binary type.
svn:mime-type = application/octet-stream
To view a listing of the svn properties on this file:
/my/full/path>svn proplist file.ext
Output:
Properties on 'file.ext':
svn:executable
svn:mime-type
To edit the svn properties of this file:
/my/full/path>svn propedit svn:mime-type file.ext
Output:
svn: None of the environment variables SVN_EDITOR, VISUAL or EDITOR is set, and no 'editor-cmd' run-time configuration option was found
/my/full/path>export EDITOR=emacs
The above sets an editor to edit the svn properties with. In the example, it is the editor "emacs". On Windows you might set this to Notepad for instance.
Now you can choose to edit these properties:
/my/full/path>svn propedit svn:mime-type file.ext
If you only opened it up in an editor to have a good look at the contents but didn't make (or save) any changes, then when you close the editor, the output will likely be:
No changes to property 'svn:mime-type' on 'file.ext'
The troublesome property is the mime-type, which we delete as follows:
/my/full/path>svn propdel svn:mime-type file.ext
Output:
property 'svn:mime-type' deleted from 'file.ext'.
Now, if we do an "svn diff" on the file (which we couldn't do before because the file's MIME type was set to binary):
/my/full/path>svn diff file.ext
the output will be:
Property changes on: file.ext
___________________________________________________________________
Name: svn:mime-type
- application/octet-stream
/my/full/path>svn commit -m "Property change from binary file into no longer having the mime-type property set (which didn't allow me to do a diff on the file)." file.ext
Sending file.ext Committed revision 16545.
Thanks to :
http://wiki.greenstone.org/wiki/index.php/Useful_SVN_Commands
SVN online book source
http://svnbook.red-bean.com/en/1.5/svn-book.html#svn.intro.whatis