The muscle consists mainly of muscle fibre, endothelial and arterial vessels which carry blood to the muscles, and nerve endings, which sense the pain. This pain sensation is stimulated by situations like bleeding inside the muscle due to tear of the muscle, prolonged contraction, prolonged stretching, accumulation of metabolic poisons which stimulates the nerve endings etc.
Moreover, the pain signals reach the spinal cord, and from there by a pathway called dorsal column with a junction in the spinal cord, where in exchange of signals are transferred to the dorsal column like a relay race. This exchange is subjected to the quantum of volleys of pain impulses, which can be allowed only to a certain extent.
This is called ‘gate control system'. If the volleys are too much, the gate naturally (physiologically) closes, and refuses to send the impulses to a higher centre, like the thalamus, and parietal brain tissue. The higher centres are only capable of realising the pain, quantum of pain, quality of pain, and the nature of the pain.
If the volleys do not reach the brain, then there is no chance of realising the pain at all. Moreover, there are lots of chemicals which makes the pain feelable, called endorphins, which play a role both for killing the pain and feeling the pain, depending on their chemical structure.
While massaging, the following reactions occur in the muscle: If the massage is gentle, then there is improved vascularity owing to mechanical rub, which carries all the accumulated bad metabolites away from the pain nerve endings.
There is a moderate stretch, hence muscles subsequently relax calmly from the contracted stage. The massage also produces multiple pain signals, which are capable of confusing the dorsal column of brain, due to increased volleys, hence the gate closes, to the higher centres so that pain is not allowed to transmit.
Massage gives a pleasant feeling due to development of good endorphins also in the brain which are capable of suppressing the pain feeling of brain, like morphine ( drug for pain ) like reactions, which stimulates an area called amydaloid in the brain which causes a pleasure sensation to body.
Windows has included batch files since before it existed… batch files are really old! Old or not, I still find myself frequently creating batch files to help me automate common tasks. One common task is uploading files to a remote FTP server. Here’s the way that I got around it.
First, you will have to create a file called fileup.bat in your windows directory, or at least inside some directory included in your path. You can use the “path” command to see what the current path is.
Inside the batch file, you will want to paste the following:
@echo off
echo user MyUserName> ftpcmd.dat
echo MyPassword>> ftpcmd.dat
echo bin>> ftpcmd.dat
echo put %1>> ftpcmd.dat
echo quit>> ftpcmd.dat
ftp -n -s:ftpcmd.dat SERVERNAME.COM
del ftpcmd.dat
You will want to replace the MyUserName, MyPassword and SERVERNAME.COM with the correct values for your ftp server. What this batch file is doing is scripting the ftp utility using the -s option for the command line utility.
The batch file uses the “echo” command to send text to the ftp server as if you had typed it. In the middle of the file you can add extra commands, potentionally a change directory command:
echo cd /pathname/>>ftpcmd.dat
In order to call this batch file, you will call the batchfile using the fileup.bat name that we gave it, and pass in the name of a file as the parameter. You don’t have to type the .bat part of the filename to make it work, either.
Example:
> fileup FileToUpload.zip
Connected to ftp.myserver.com.
220 Microsoft FTP Service
ftp> user myusername
331 Password required for myusername.
230 User myusername logged in.
ftp> bin
200 Type set to I.
ftp> put FileToUpload.zip
200 PORT command successful.
150 Opening BINARY mode data connection for FileToUpload.zip
226 Transfer complete.
ftp: 106 bytes sent in 0.01Seconds 7.07Kbytes/sec.
ftp> quit
And that’s all there is to it. Now your file should be sitting on the remote server.
The following information is provided as a reference for the File Transfer Protocol (FTP) commands. This document describes a typical process for an interactive and automated, batch FTP session running on a PC with Windows/2000 and connecting to a UNIX system. This process may vary slightly depending on the hardware and software configurations of the local and remote systems.
To start an FTP interactive session type "ftp" from a DOS Command window.
C:\> ftp
The DOS prompt should be replaced with the FTP prompt. The FTP program is now running on the local system. A connection (or session) to a remote system has not been established.
The help command or ? (question mark) may be executed without being attached to a remote system and will do a print (usually to the screen) of the FTP commands. The following is a typical result of the help command running on a PC with Windows.
ftp> helpCommands may be abbreviated. Commands are:
! delete literal prompt send
? debug ls put status
append dir mdelete pwd trace
ascii disconnect mdir quit type
bell get mget quote user
binary glob mkdir recv verbose
bye hash mls remotehelp
cd help mput rename
close lcd open rmdirftp>
The following commands will establish a connection (or session) by doing a logon between the local FTP program and a remote system.
ftp> open domain.nameConnected to domain.name
220 antigonous FTP server ready.User (domain.name:(none)):User-Name331 Password required for user-namePassword: password230 User user-name logged in.ftp>
The following command will change the directory on the remote system.
ftp> cd /web250 CWD command successful.ftp>
The following command will find out the pathname of the current directory on the remote system and display the information.
ftp> pwd257 "/web" is the current directory.ftp>
The following command will set the file transfer mode to ASCII (this is the default and transmits seven bits per byte).
ftp> ascii200 Type set to A.ftp>
The following command will copy a file from the local system to the remote system.
ftp> put d:\simoweb1\filename.txt200 PORT command successful.
Opening ASCII mode data connection for filename.txt
226 Transfer completeftp>
The following command will set the file transfer mode to binary (the binary mode transfers all eight bits per byte and must be used to transfer non-ASCII files).
ftp> binary200 Type set to I.ftp>
The following command will copy a file from the local system to the remote system.
ftp> put d:\simoweb1\filename.zip200 PORT command successful.
Opening BINARY mode data connection for filename.zip
226 Transfer completeftp>
The following command will exit the FTP environment (same as "bye").
ftp> quit221 Goodbye.
When the preceding command is finished the DOS prompt will be displayed.
C:\>
The preceding is a typical process for an interactive FTP session running on a PC with Windows/2000 and connecting to a UNIX system. This process may vary slightly depending on the hardware and software configurations of the local and remote systems.
The following batch file (UPWIP001.BAT) will start an FTP session and pass the name of a text file (UPWIP001.TXT) to the FTP program. This text file will be processed by the FTP program and each of the statements in the text file will be processed in the sequence they appear.
@echo OFFecho * *******************************************************************
echo * This program is provided by: *
echo * SimoTime Enterprises, LLC *
echo * (C) Copyright 1987-2001 All Rights Reserved *
echo * Web Site URL: http://www.simotime.com *
echo * e-mail: helpdesk@simotime.com *
echo * *******************************************************************
echo *
echo * This batch and text file illustrate the use of FTP to upload an
echo * ASCII file and an EBCDIC or Binary file. The UPWIP001.BAT file
echo * references UPWIP001.TXT that contains...
echo *
echo * user
echo * password
echo * cd /web
echo * pwd
echo * ascii
echo * put d:\simoweb1\cbltxn01.htm
echo * binary
echo * put d:\simoweb1\cbltxn01.zip
echo * quit
echo *ftp -s:upwip001.txt www.simotime.com
The following is a listing of the contents of the text file (UPWIP001.TXT).
userpassword
cd /web
pwd
ascii
put d:\simoweb1\cbltxn01.htm
binary
put d:\simoweb1\cbltxn01.zip
quit
The following is a summary of the commonly used FTP Commands.
Command
Description
!
Preceding a command with the exclamation point will cause the command to execute on the local system instead of the remote system.
?
Request assistance or information about the FTP commands. This command does not require a connection to a remote system.
ascii
Set the file transfer mode to ASCII (Note: this is the default and transmits seven bits per byte).
bell
Turns bell mode on / off. This command does not require a connection to a remote system.
binary
Set the file transfer mode to binary (Note: the binary mode transfers all eight bits per byte and must be used to transfer non-ASCII files).
bye
Exit the FTP environment (same as quit). This command does not require a connection to a remote system.
cd
Change directory on the remote system.
close
Terminate a session with another system.
debug
Sets debugging on/off. This command does not require a connection to a remote system.
delete
Delete (remove) a file in the current remote directory (same as rm in UNIX).
dir
Lists the contents of the remote directory.The asterisk (*) and the question mark (?) may be used as wild cards. For example:
dir b*
This will display all entries that start with the letter "b". For example, the following will be displayed. bet, ben, bingo, born, boon, bipartisan, bandit, boy
dir b*n*
This will display all entries that start with the letter "b" and have the letter "n" somewhere after the letter "b". For example, the following will be displayed. ben, bingo, born, boon, bipartisan, bandit The following will not be displayed. bet, boy
dir b?n
This will display all entries that start with the letter "b", have the letter "n" in the 3rd position and have a three character name. For example, the following will be displayed. ben The following will not be displayed. bet, bingo, born, boon, bipartisan, bandit, boy
dir b?n*
This will display all entries that start with the letter "b" and have the letter "n" in the 3rd position. For example, the following will be displayed. ben, bingo, bandit The following will not be displayed. bet, born, boon, bipartisan, boy
get
Copy a file from the remote system to the local system.
get filename-1
Copy (or replace) filename-1 from the current remote directory to a file with the same name in the current local directory.
get filename-1filename-2
Copy (or replace) filename-1 from the current remote directory to filename-2 in the current local directory.
help
Request a list of all available FTP commands. This command does not require a connection to a remote system.
lcd
Change directory on your local system (same as CD in UNIX).
ls
List the names of the files in the current remote directory.
mget
Copy multiple files from the remote system to the local system. (Note: You will be prompted for a "y/n" response before copying each file).
mget *
Copies all the files in the current remote directory to the current local directory, using the same filenames. Note the use of the asterisk (*) as a wild card character.
mkdir
Make a new directory within the current remote directory.
mput
Copy multiple files from the local system to the remote system. (Note: You will be prompted for a "y/n" response before copying each file).
open
Open a connection with another system.
put
Copy a file from the local system to the remote system.
pwd
Find out the pathname of the current directory on the remote system.
quit
Exit the FTP environment (same as "bye"). This command does not require a connection to a remote system.
rmdir
Remove (delete) a directory in the current remote directory.
trace
Toggles packet tracing. This command does not require a connection to a remote system.
The following are additional commands that are used when tranferring files between an IBM Mainframe and a Windows or UNIX client swystem. Also, the following includes commands required when working with files containing variable length records.
userpassword
CD ..
PWD
VERBOSE
BINARY
LITERAL SITE RDW LRECL=80 RECFM=FB TRACKS PRIMARY=10 SECONDARY=5
PUT c:\SimoDemo\TestLib1\DataFtp1\CARDFILE.DAT SIMOTIME.DATA.CARDFILE
QUIT
If you have an rpm file for a package you wish to install, and if you cannot find a .deb debian package in any of the Ubuntu repositories or elsewhere, you can use the alien package converter application to install the .rpm file.
Alien is a program that converts between the rpm, dpkg, stampede slp, and slackware tgz file formats. If you want to use a package from another distribution than the one you have installed on your system, you can use alien to convert it to your preferred package format and install it.
Despite the large version number, alien is still (and will probably always be) rather experimental software. It has been used by many people for many years, but there are still many bugs and limitations.
Alien should not be used to replace important system packages, like sysvinit, shared libraries, or other things that are essential for the functioning of your system. Many of these packages are set up differently by Debian and Red Hat, and packages from the different distributions cannot be used interchangably. In general, if you can’t uninstall the package without breaking your system, don’t try to replace it with an alien version.
Instructions for Installing RPM Files Using Alien
Installing Alien
You can install alien itself from the Ubuntu Universe repository by adding the repository to your list of sources and doing:
$sudo apt-get update

$sudo apt-get install alien
Installing the .rpm file
To install the .rpm file, you first need to convert it to a .deb file which can be installed on Ubuntu.
I assume that you downloaded the package to your Desktop (~/Desktop is the directory)
You can convert the .rpm to a .deb by using the following commands. $cd ~/Desktop
-This will change the directory to your desktop, where you have the .rpm file. $sudo alien -k name-of-rpm-file.rpm
- This will convert the .rpm to a .deb.
- The “-k” will keep the version number. Otherwise alien adds a “1″ to the version number.
- Tip: Use Smart Tab Completion to avoid mistyping the file names $sudo dpkg -i name-of-deb-file.deb
- This will install the .deb package
Try reading the alien manpage for more details on how to convert other kinds of packages and the options available.
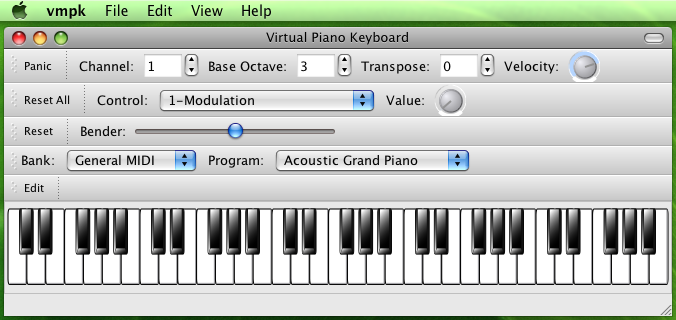
Virtual MIDI Piano Keyboard is a MIDI events generator and receiver. It doesn't produce any sound by itself, but can be used to drive a MIDI synthesizer (either hardware or software, internal or external). You can use the computer's keyboard to play MIDI notes, and also the mouse. You can use the Virtual MIDI Piano Keyboard to display the played MIDI notes from another instrument or MIDI file player. To do so, connect the other MIDI port to the input port of VMPK.
Gymnopédie No. 1 by E. Satie (1866–1925) played by MuseScore and VMPK in Linux
VMPK has been tested in Linux, Windows and Mac OSX, but maybe you can build it also in other systems. If so, please drop a mail to the author.
The Virtual Keyboard by Takashi Iway (vkeybd) has been the inspiration for this one. It is a wonderful piece of software and has served us well for many years. Thanks!
VMPK uses a modern GUI framework: Qt4, that gives excellent features and performance. RtMIDI provides MIDI input/output features. Both frameworks are free and platform independent, available for Linux, Windows and Mac OSX.
The alphanumeric keyboard mapping can be configured from inside the program using the GUI interface, and the settings are stored in XML files. Some maps for Spanish, German and French keyboard layouts are provided, translated from the ones provided by VKeybd.
VMPK can send program changes and controllers to a MIDI synth. The definitions for different standards and devices can be provided as .INS files, the same format used by QTractor and TSE3. It was developed by Cakewalk and used also in Sonar.
This software is in a very early alpha stage. See the TODO file for a list of pending features. Please feel free to contact the author to ask questions, report bugs, and propose new features. You can use the tracking system at SourceForge project site.
Copyright (C) 2008-2010, Pedro Lopez-Cabanillas
Virtual MIDI Piano Keyboard is free software licensed under the terms of the GPL v3 license.
Screenshots gallery
Getting started
MIDI concepts
MIDI is an industry standard to connect musical instruments. It is based on transmitting the actions performed by a musician playing some instrument to another different instrument. Musical instruments enabled with MIDI interfaces typically have two DIN sockets labeled MIDI IN and MIDI OUT. Sometimes there is a third socket labeled MIDI THRU. To connect a MIDI instrument to another one, you need a MIDI cable attached to the MIDI OUT socket of the sending instrument, and to the MIDI IN of the receiving one. You can find more information and tutorials like this one all around the Net.
There are also hardware MIDI interfaces for computers, providing MIDI IN and OUT ports, where you can attach MIDI cables to communicate the computer with external MIDI instruments. Without needing hardware interfaces, the computer can also use MIDI software. An example is VMPK, which provides MIDI IN and OUT ports. You can attach virtual MIDI cables to the VMPK's ports, to connect the program to other programs or to the computer's physical MIDI interface ports. More details about this coming later. You usually want to connect the MIDI output from VMPK to the input of some synthesizer which transforms MIDI into sound. Another common destination for the connection would be a MIDI monitor that translates MIDI events into readable text. This will help you to understand what kind of information is transmitted using the MIDI protocol. In Linux you can try KMidimon and in Windows MIDIOX.
VMPK doesn't produce any sound. You need a MIDI software synthesizer to hear the played notes. I recommend you to try QSynth, a graphical front-end to Fluidsynth. It is also possible to use the "Microsoft GS Wavetable SW Synth" that comes with XP. Of course, an external MIDI hardware synth would be an even better approach.
Keyboard maps and instrument definitions
VMPK can help you to change sounds in your MIDI synthesizer, but only if you provide a definition for the synthesizer sounds first. The definitions are text files with the .INS extension, and the same format used by Qtractor (Linux), and Sonar (Windows).
When you start VMPK the first time, you should open the Preferences dialog and choose a definition file, and then select the instrument name among those provided by the definitions file. There should be one instrument definitions file installed in the VMPK's data directory (typically "/usr/share/vmpk" in Linux, and "C:\Program Files\VMPK" in Windows) named "gmgsxg.ins", containing definitions for the General MIDI, Roland GS and Yamaha XG standards. It is a very simple format, and you can use any text editor to look, change, and create a new one. You can find a library of instruments definitions at the cakewalk ftp server.
Since the release 0.2.5 you can also import Sound Font files (in .SF2 or DLS formats) as instruments definitions, using a dialog available at menu File->Import SoundFont.
Another customization that you may want to tweak is the keyboard mapping. The default layout maps about two and half octaves for the QWERTY alphanumeric keyboard, but there are some more definitions in the data directory, adapted for other international layouts. You can even define your own mapping using a dialog box available in the Edit->Keyboard map menu. There are also options to load and save the maps as XML files. The last loaded map will be remembered the next time you start VMPK. In fact, all your preferences, selected MIDI bank and program, and the controller values will be saved on exit, and restored when you restart VMPK the next time.
MIDI connections and virtual MIDI cables
To connect hardware MIDI devices you need physical MIDI cables. To connect MIDI software you need virtual cables. In Windows you can use some virtual MIDI cable software, like MIDI Yoke, Maple, LoopBe1 or Sony Virtual MIDI Router.
MIDI Yoke setup process will install the driver and a control panel applet to change the number of MIDI ports that will be available (you need to restart the computer after changing this setting). MIDI Yoke works sending every MIDI event written to an OUT port to the corresponding IN port. For instance, VMPK can connect the output to the port 1, and another program like QSynth can read the same events from the port 1.
Using MIDIOX you can add more routes between MIDI Yoke ports and other system MIDI ports. This program also provides other interesting functionalities, like a MIDI file player. You can listen the songs played in a MIDI Synth and at the same time see the played notes (only one channel at a time) in VMPK. To do so, you can use the "Routes" window in MIDIOX to connect the input port 1 to the Windows Synth port. Also, configure the player's MIDI port to send to MIDI Yoke 1. And configure VMPK Input port to read from MIDI Yoke 1. The player will send the events to the out port 1, which will be routed to both the input port 1 and at the same time to the synth port.
In Linux, you have ALSA sequencer to provide the virtual cables. The ports are dynamically created when you start a program, so there is not a fixed number of them like in MIDI Yoke. The command line utility "aconnect" allows to connect and disconnect the virtual MIDI cables between any ports, being hardware interfaces or applications. A nice GUI utility for doing the same is QJackCtl. The main purpose of this program is to control the Jack daemon (start, stop and monitor the state). Jack provides virtual audio cables to connect your sound card ports and audio programs, in a similar way to the MIDI virtual cables, but for digital audio data.
QJackCtl connections in Linux
Frequently Asked Questions
How to display 88 keys?
88 is an arbitrary number of keys used by (most) modern piano manufacturers, but organ and synthesizer manufacturers don't always follow this convention. VMPK can be customized to display from 1 to 10 octaves. Using 7 octaves it shows 84 keys, and for 8 octaves it shows 98 keys. There is no way to display exactly 7 and half octaves.
There is no sound
VMPK doesn't produce any sound by itself. You need a MIDI synthesizer, and please read the documentation again.
Some keys are silent
When you select channel 10 on a standard MIDI synth, it plays percussion sounds assigned to many keys but not to all of them. On melodic channels (not channel 10) you can select patches with a limited range of notes. This is known in music as Tessitura.
The "Grab Keyboard" option fails
It is a known issue for Linux users. This feature works well in KDE3/4 desktops using the standard kwin window manager; it also works with Enlightenment and Window Maker, but fails in Metacity and Compiz window managers, common among Gnome setups. It is also known that using this option prevents normal usage of the drop down menus on GTK2 applications. There is no known solution for this issue, except avoiding the broken scenarios if you really need this feature.
Patch names don't match the real sounds
You need to provide an .INS file describing exactly your synthesizer's sound set or soundfont. The included file (gmgsxg.ins) contains definitions for only standard GM, GS and XG instruments. If your MIDI synth doesn't match exactly any of them, you need to get another .INS file, or create it yourself.
Can I convert my Instrument Definition for vkeybd into an .INS file?
Sure. Use the AWK script "txt2ins.awk". You can even use the utility sftovkb from vkeybd to create an .INS file from any SF2 soundfont, but there is also a function to import the instrument names from SF2 and DLS files in VMPK.
You can choose between CMake and Qmake to prepare the build system, but qmake is intended only for testing and development.
$ cmake .
or
$ ccmake .
or
$ qmake
After that, compile the program:
$ make
If the program has been compiled sucessfully, you can install it:
$ sudo make install
Requirements
In order to successfully build and use VMPK, you need Qt 4.4 or newer. (install the -devel package for your system, or download the open source edition from qt.nokia.com, formerly Trolltech.) RtMIDI is included in the source package. It uses ALSA sequencer in Linux, WinMM in Windows and CoreMIDI in Mac OSX, which are the native MIDI systems in each supported platform.
The build system is based on CMake.
You need also the GCC C++ compiler. MinGW is a Windows port.
Optionally, you can buid a Windows setup program using NSIS.
Notes for windows users
To compile the sources in Windows, you need to download either the .bz2 or .gz archive and uncompress it using any utility that supports the format, like 7-Zip.
To configure the sources, you need qmake (from Qt4) or CMake. You need to set the PATH including the directories for Qt4 binaries, MinGW binaries, and also CMake binaries. The program CMakeSetup.exe is the graphic version of CMake for Windows.
Notes for Mac OSX users
You can find a precompiled universal app bundle, including Qt4 runtime libraries, at the project download area. If you prefer to install from sources, CMake or Qmake can be used to build the application bundle linked to the installed system libraries. You can use Qt4 either from qtsoftware.com or the package distributed by Fink.
The build system is configured to create an universal binary (x86+ppc) into an app bundle. You need the Apple development tools and frameworks, as well as the Qt4 SDK from Nokia.
To compile VMPK using Makefiles, generated by qmake:
If you need something to produce noise, maybe you want to take a look to SimpleSynth, FluidSynth (available from Fink). For MIDI routing, there is also MIDI Patchbay.
Notes for packagers and advanced users
You can ask the compiler for some optimisation when building the program. There are two ways: first, using a predefined build type.
$ cmake . -DCMAKE_BUILD_TYPE=Release
The CMake "Release" type uses the compiler flags: "-O3 -DNDEBUG". Other predefined build types are "Debug", "RelWithDebInfo", and "MinSizeRel". The second way is to choose the compiler flags yourself.
You need to find the better CXXFLAGS for your own system.
If you want to install the program at some place other than the default (/usr/local) use the following CMake option:
A Brief Description of the MiniCard interface. MiniCard is also called Mini PCI Express bus [PCI= Peripheral Component Interface]. The Minicard is a small form factor board used to implement the PCI Express interface on Notebook computers. The card size is 30mm wide by 50.95mm long by 5mm high. The Minicard uses a 52-pin card edge connector, the card pins are fingers at the edge of the card. MiniCard is used to implement both the 1x PCI Express Bus interface and a USB 2.0 interface.
Refer to the main PCI Express Bus for a list of manufacturers producing interface IC's
Like other PC buses, there are no glue logic devices just ASICs and chip sets in PCI Express; Similar to PCI. Refer to the LVDS page for additional information on the LVDS electrical interface. This page provides a comparison of Interface Switching levels for different types of electrical standards.
PCI: The original specification 'Peripheral Component Interface', [parallel interface] PCI Express Bus: [used in desktop computers, the physical layer is not compatible with the PCI bus]
PCIe Mini Card Electromechanical Specification [used in Notebook/Laptop computers]
PCISIG {Peripheral Component Interconnect - Special Interest Group}
A Mini-PCI Express connector accepts a 52-pin card edge with one key slot. The Board has fingers at the card edge, the card key is an absence of fingers.
Introduced in 2003. Smaller version of PCI Express, intended for notebook computers.
Pinout
Pin
Name
Pin
Name
51
Reserved
52
+3.3Vaux
49
Reserved
50
GND
47
Reserved
48
+1.5V
45
Reserved
46
LED_WPAN#
43
GND
44
LED_WLAN#
41
+3.3Vaux
42
LED_WWAN#
39
+3.3Vaux
40
GND
37
GND
38
USB_D+
35
GND
36
USB_D-
33
PETp0
34
GND
31
PETn0
32
SMB_DATA
29
GND
30
SMB_CLK
27
GND
28
+1.5V
25
PERp0
26
GND
23
PERn0
24
+3.3Vaux
21
GND
22
PERST#
19
Reserved (UIM_C4)
20
W_DISABLE#
17
Reserved (UIM_C8)
18
GND
Mechanical Key
15
GND
16
UIM_VPP
13
REFCLK+
14
UIM_RESET
11
REFCLK-
12
UIM_CLK
9
GND
10
UIM_DATA
7
CLKREQ#
8
UIM_PWR
5
COEX2
6
1.5V
3
COEX1
4
GND
1
WAKE#
2
3.3Vaux
Note: Pin 17 & 19 are reserved for future UIM interface (if needed). http://www.hardwarebook.info/PCI_Express_Mini_Card ----------------------------------------------------------------------------------------------
PCI Express Mini Card (also known as Mini PCI Express, Mini PCIe, and Mini PCI-E) is a replacement for the Mini PCI form factor based on PCI Express. It is developed by the PCI-SIG. The host device supports both PCI Express and USB 2.0 connectivity, and each card uses whichever the designer feels most appropriate to the task. Most laptop computers built after 2005 are based on PCI Express and can have several Mini Card slots.
Top side
Bottom side
1
2
3.3V
3
Reserved****
4
GND
5
Reserved****
6
1.5V
7
CLKREQ#
8
Reserved**
9
GND
10
Reserved**
11
REFCLK-
12
Reserved**
13
REFCLK+
14
Reserved**
15
16
Reserved**
Mechanical key
17
Reserved
18
GND
19
Reserved
20
Reserved***
21
GND
22
PERST#
23
PERn0
24
+3.3Vaux
25
PERp0
26
GND
27
GND
28
+1.5V
29
GND
30
SMB_CLK
31
PETn0
32
SMB_DATA
33
PETp0
34
GND
35
GND
36
USB_D-
37
Reserved*
38
USB_D+
39
Reserved*
40
GND
41
Reserved*
42
LED_WWAN#
43
Reserved*
44
LED_WLAN#
45
Reserved*
46
LED_WPAN#
47
Reserved*
48
+1.5V
49
Reserved*
50
GND
51
Reserved*
52
+3.3V
*Reserved for future second PCI Express Lane (if needed)
**Reserved for future Subscriber Identity Module (SIM) interface (if needed)
***Reserved for future wireless disable signal (if needed)
****Reserved for future wireless coexistence control interface (if needed)
FACTS: If you're unfamiliar with using feet and inches for height in English, here's a quick overview: If you're 5 feet 10 inches tall, and someone asks how tall you are, you could answer this way: I'm five ten. Another possible answer: I'm five foot ten. Japanese people use only centimeters.
The height of the average Japanese male is 165.5cm, or a little over 5 foot five inches. The average female is 153cm, or just over five feet.
The height of the average American male is 175.5 centimeters, a little over 5 foot 9 inches. The average female is 162.5cm, or five feet four inches.
OpenSSH is a well known program which allows you to login to a host remotely, and run commands etc. It also comes with a simple file transfer system which can be used to transfer files securely. scp is the command to use. You can either transfer files to the remote machine from your local one, or vice versa.
Usage is as simple as:
scp file-to-send user@host:/path/to/place/file
For example to copy the password file from your local machine (bennevis to a remote server called 'earth' you could use:
As no destination directory was specified the file will be transferred to your home directory upon the remote machine.
If you wish to transfer a lot of files you can copy a directory recurisvely, with the -r flag. When it comes to sending files to and from you Unix machine from a Windows desktop you can use the excellent open source program WinSCP which presents a drag and drop interface to remote file systems - allowing you to drag and drop files with ease.
With OpenSSh installed you have no reason to be running insecure systems such as FTP to copy files to and from your Unix servers.
================
Using scp to transfer files in Linux
The scp command copies files to or from a remote Linux system. You will be prompted for your TCC password for authentication.
To copy files from the local system to a remote system:
scp file... user@host.domain:path
where:
file
File to be copied.
user
Your username on the remote system.
host.domain
The Internet address of the remote system, such as linux.nmt.edu.
path
The absolute path name to the destination on the remote system.
To copy files from a remote system to your local system:
scp user@host.domain:path ... dest
where dest is the path name on your local system where you want the files copied.
Examples:
scp ann beth clyde forsythe@linux.nmt.edu:/u/forsythe/tmp
scp 'forsythe@linux.nmt.edu:/u/forsythe/images/*.jpg' pictures/LaborDay
=================
scp - Linux command line tool to copy files over ssh
scp stands for secure cp (copy), which means that you can copy files across an ssh connection that will be encrypted, and therefore secured.
You can this way copy files from or to a remote server, you can even copy files from one remote server to another remote server, without passing through your PC. Usage scp [[user@]from-host:]source-file [[user@]to-host:][destination-file] Description of options
from-host
Is the name or IP of the host where the source file is, this can be omitted if the from-host is the host where you are actually issuing the command
user
Is the user which have the right to access the file and directory that is supposed to be copied in the cas of the from-host and the user who has the rights to write in the to-host
source-file
Is the file or files that are going to be copied to the destination host, it can be a directory but in that case you need to specify the -r option to copy the contents of the directory
destination-file
Is the name that the copied file is going to take in the to-host, if none is given all copied files are going to maintain its names
Options
-p
Preserves the modification and access times, as well as the permissions of the source-file in the destination-file
-q
Do not display the progress bar
-r
Recursive, so it copies the contents of the source-file (directory in this case) recursively
-v
Displays debugging messages
Examples
scp *.txt user@remote.server.com:/home/user/
This will copy all files with .txt extension to the directory /home/user in the remote.server.com host
This is going to recursively copy all files from miguel's Home directory on 10.1.2.2 host to his Home directory in 10.1.2.3 host. Note
To use this command you need to have open-ssh installed in the hosts.
===========
In Unix, how do I use the scp command to securely transfer files between two computers?
In Unix, you can use the scp command to copy files and directories securely between remote hosts without starting an FTP session or logging into the remote systems explicitly. The scp command uses SSH to transfer data, so it requires a password or passphrase for authentication. Unlike rcp or FTP, scp encrypts both the file and any passwords exchanged so that anyone snooping on the network can't view them. Warning: Be careful when copying between hosts files that have the same names; you may accidently overwrite them.
The syntax for the scp command is: scp [options] [[user@]host1:]filename1 ... [[user@]host2:]filename2 For example, if user dvader is on a computer called empire.gov, and wants to copy a file called file1.txt to a directory called somedir in his account on a computer called deathstar.com, he would enter: scp file1.txt dvader@deathstar.com:somedir Likewise, if he wanted to copy the entire contents of the somedir directory on deathstar.com back to his empire.gov account, he would enter: scp -r dvader@deathstar.com:somedir somedir Similarly, if he is working on another computer, but wanted to copy a file called file1.txt from his home directory on empire.gov to a directory called somedir in his account on deathstar.com, he would enter: scp dvader@empire.gov:file1.txt dvader@deathstar.com:somedir When using wildcards (e.g., * and ? ) to copy multiple files from a remote system, be sure to enclose the filenames in quotes. This is because the Unix shell, not the scp command, expands unquoted wildcards.
For more information about scp, consult its man page. At the Unix prompt, enter: man scp


 VMPK 0.3.0


 QJackCtl connections in Linux

